Hi,
Welcome to another blog post about AVD in combination with Terraform. This time I’m looking at the storage for the AVD profiles. To store the FSLogix profiles you have several options. You have Azure Files, a fileserver or you can use Azure NetApp Files. In this blog I’ll explain what steps you need for the last one.
For those wanting more information about Azure NetApp files and why you should you use it you can use this link.
- Register resource providers
- Request quota increase
- extra subnet for ANF
- Domain controller and correct DNS servers for AD join
Register resource providers
The first thing you need to do when you want to deploy an ANF account is to register the resource provider for ANF. When you go to your subscription and select resource providers and search for ANF you will see it’s NotRegistered.
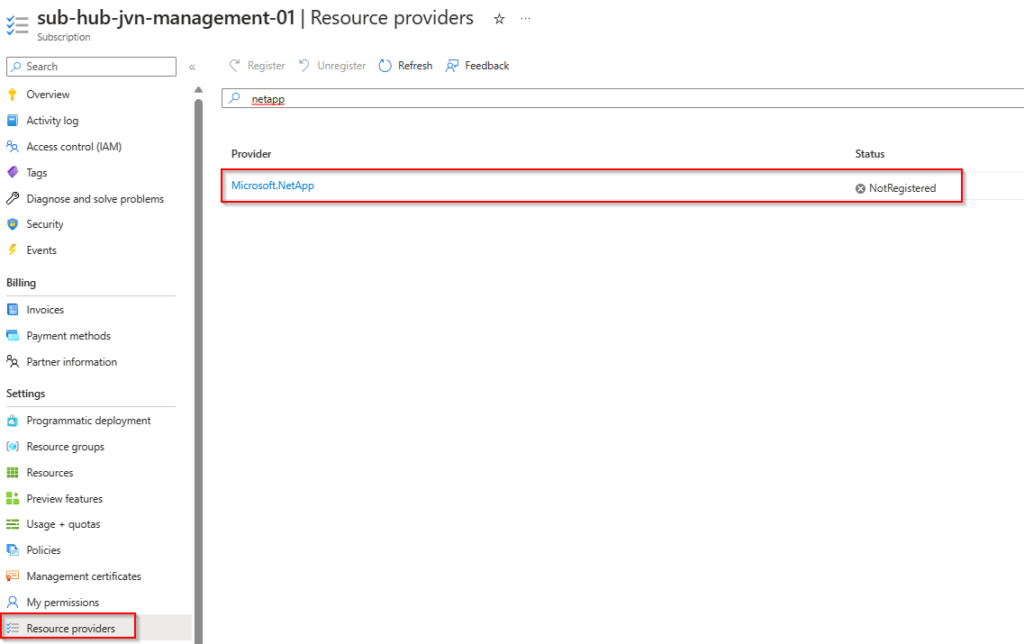
To register you can use the portal or Cloudshell. Make sure you select the correct subscription and run the command to register ANF.

When the command is done you go back to the resource providers and check the status and see it’s now registered.

Request Quota increase
During my deployment I got the following error.

In order to solve this error I had to create a support ticket. The creation of an ANF account is not allowed by standard so we need to request this for the correct subscription.
Deployment prerequisites.
Before we can deploy ANF we need to import a couple of resources in our terraform file.
- Delegated ANF subnet
- Resource group for ANF
- Key Vault to store the secret
- Key Vault secret for the domain join
Delegated ANF subnet
ANF requires a dedicated subnet that will default to /24. You can also a /28 subnet in most scenario’s.
data "azurerm_subnet" "netapp-subnet" {
  provider            = azurerm.hub
  name                = "snet-${var.spoke}-${var.prefix}-${var.solution}-netapp-01"
  resource_group_name = "rg-${var.spoke}-${var.prefix}-${var.solution}-networking-01"
  virtual_network_name = "vnet-${var.spoke}-${var.prefix}-${var.solution}-we-01"
}
data "azurerm_resource_group" "storage-avd" {
  provider            = azurerm.hub
  name = "rg-${var.spoke}-${var.prefix}-${var.solution}-storage-01"
}
data "azurerm_key_vault" "kv-avd" {
  name = "kv-${var.spoke}-${var.prefix}-${var.solution}-80"
  resource_group_name = "rg-${var.spoke}-${var.prefix}-${var.solution}-management-01"
}
data "azurerm_key_vault_secret" "adm" {
  name = "admjohan"
  key_vault_id = data.azurerm_key_vault.kv-avd.id
}
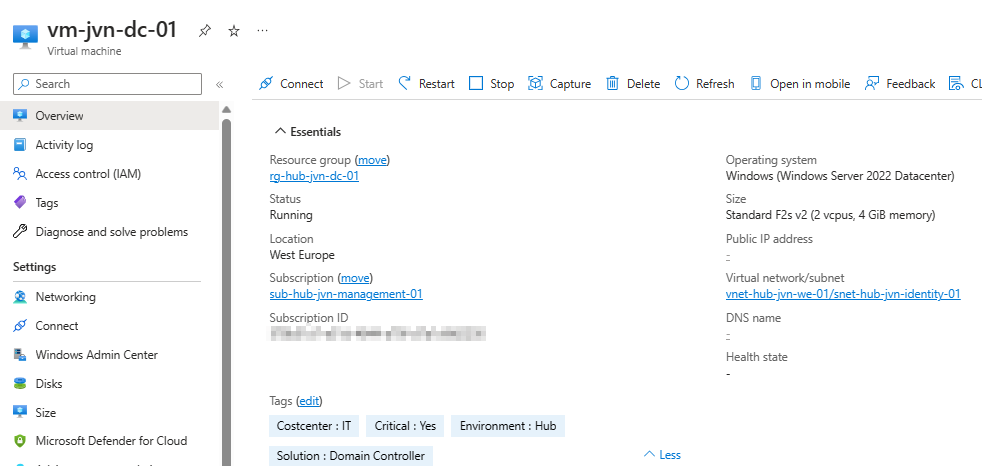
Domain controller and correct DNS servers for AD join
Because the ANF account will be domain joined we need line of sight to the domain controller. In my case a dc in my hub vnet that is peered with my prd AVD vnet. Also make sure that the account you use has domain join permissions.
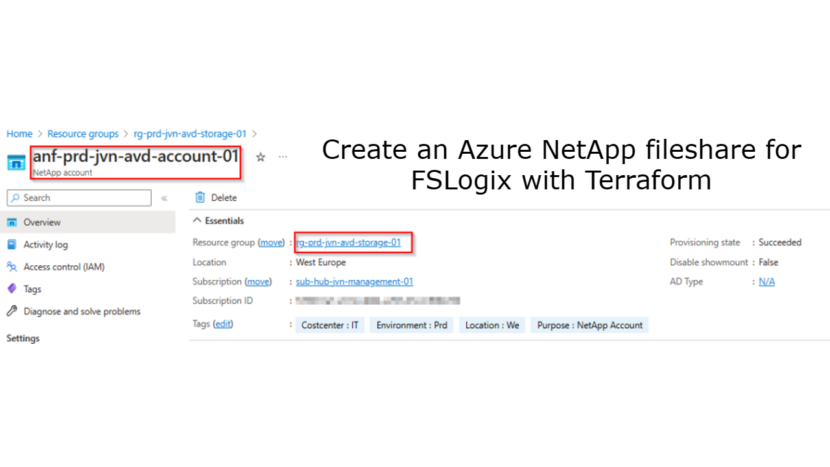
Deploy Azure Netapp account
Now that we have the resource provider and the ability to deploy ANF it’s time to create our first ANF account. We need to add the details for the AD connection in here.
resource "azurerm_netapp_account" "net-app-account" {
  name                = "anf-${var.spoke}-${var.prefix}-${var.solution}-account-01"
  resource_group_name = data.azurerm_resource_group.storage-avd.name
  location            = data.azurerm_resource_group.storage-avd.location

  active_directory {
    username            = "admjohan"
    password            = data.azurerm_key_vault_secret.adm.value
    smb_server_name     = "CORP"
    dns_servers         = ["10.1.1.244"]
    domain              = "corp.johanvanneuville.com"
    organizational_unit = "OU=Storage,OU=Prd,OU=Azure,DC=corp,DC=johanvanneuville,DC=com"
  }
  tags = {
    "Location"    = "We"
    "Costcenter"  = "IT"
    "Purpose"     = "NetApp Account"
    "Environment" = "Prd"
  }
}
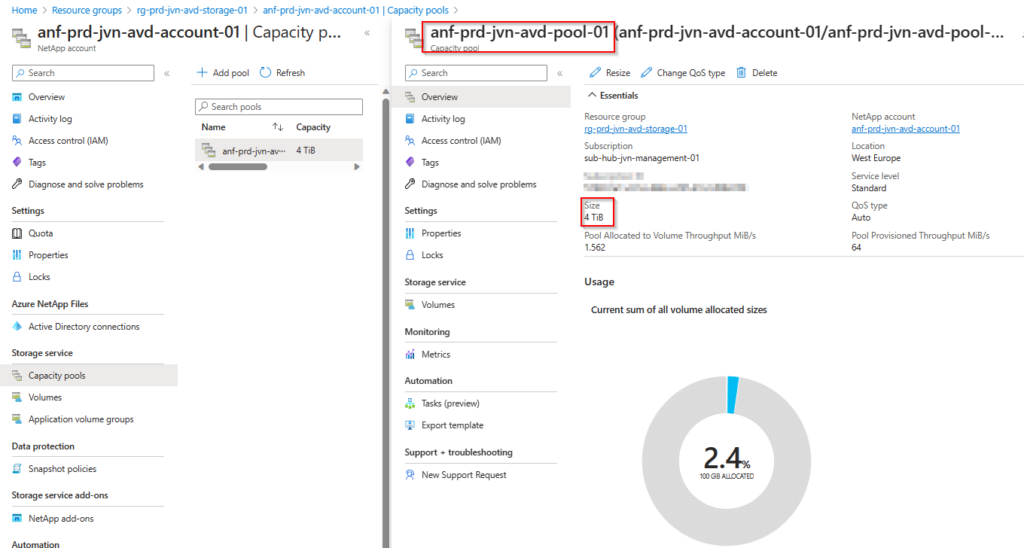
After this it’s time to create our first ANF pool. The default size for an ANF pool is 4TB.
resource "azurerm_netapp_pool" "example" {
  name                = "anf-${var.spoke}-${var.prefix}-${var.solution}-pool-01"
  account_name        = azurerm_netapp_account.net-app-account.name
  location            = data.azurerm_resource_group.storage-avd.location
  resource_group_name = data.azurerm_resource_group.storage-avd.name
  service_level       = "Standard"
  size_in_tb          = 4
   tags = {
    "Location"    = "We"
    "Costcenter"  = "IT"
    "Purpose"     = "NetApp pool"
    "Environment" = "Prd"
  }
}
The last item to add is the ANF volume.
resource "azurerm_netapp_volume" "example" {
  lifecycle {
    prevent_destroy = true
  }

  name                       = "anf-${var.spoke}-${var.prefix}-${var.solution}-volume-01"
  location                   = data.azurerm_resource_group.storage-avd.location
  zone                       = "1"
  resource_group_name        = data.azurerm_resource_group.storage-avd.name
  account_name               = azurerm_netapp_account.net-app-account.name
  pool_name                  = "anf-${var.spoke}-${var.prefix}-${var.solution}-pool-01"
  volume_path                = "anf-${var.spoke}-${var.prefix}-${var.solution}-pool-01-fslogix"
  service_level              = "Standard"
  subnet_id                  = data.azurerm_subnet.netapp-subnet.id
  network_features           = "Basic"
  protocols                  = ["CIFS"]
  security_style             = "Ntfs"
  storage_quota_in_gb        = 100
  snapshot_directory_visible = false

}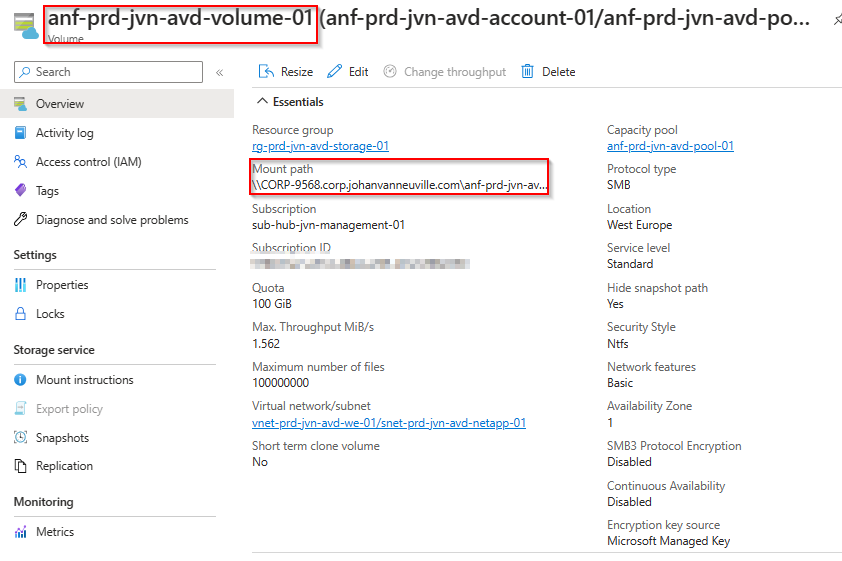
With these steps done we can use this volume as storage for the FSLogix profiles.
I hope this blog post will help you to use ANF for FSLogix if you need the performance of ANF.
Feel free to contact me if you have any questions about this subject.