Hi everyone,
Welcome to another blog post about Nerdio and how it can help organizations with managing AVD. In this mini series I’ll take a look the at the user self service portal. In this first part I’ll cover the admin side and how to configure the portal for the users.
Typically an end-user who needs a personal device are people who are developing or need extra permissions to run applications. Since they are using a personal device, any action they take won’t affect another user. Nerdio has created a portal where the users of a personal device can do certain actions.
Let’s have a look first at the prerequisites to enable this feature.
- Correct Role for the AVD users in Nerdio
- Activate the feature in the host pool properties
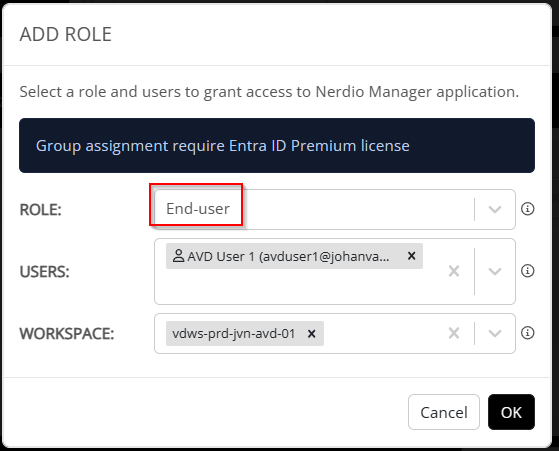
Correct Role for the AVD users in Nerdio
The built-in roles can be viewed in the left blade under RBAC roles > Definitions

To assign the role select the Assignments tab and click on Add on the rights.

In this example, I assign the end-user role to my avd test user.
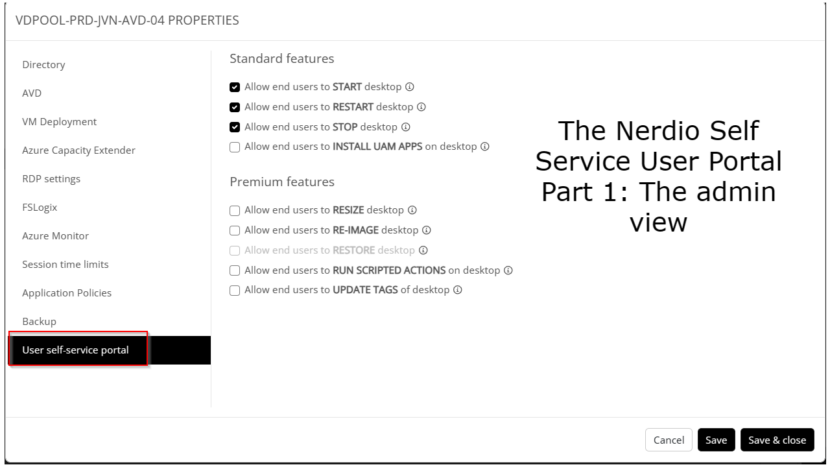
Activate the feature in the host pool properties
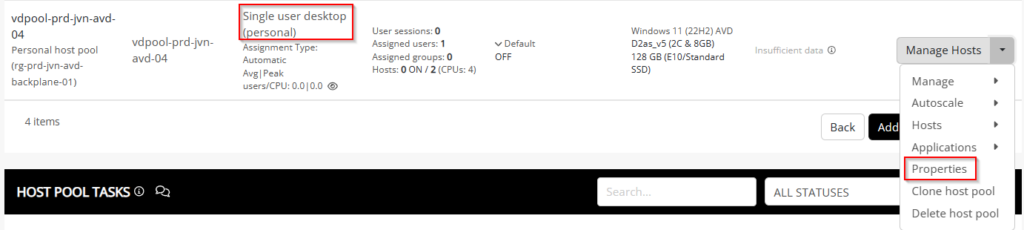
After assigning the role to the user, the host pool needs to be configured. This is done by going to the host pool properties.
In this menu, the IT admin select the Self service user portal menu to select the options that needs to be activated.

There are different features that are available depending on the type of license that is being used.
Standard features
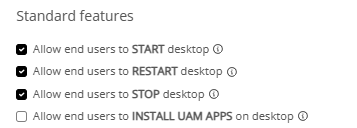
With the standard features that are available, the IT admin can make sure that the end-users can start, restart or stop their desktop. The first 3 options are selected by default. The install UAM apps is available if this is configured in the Nerdio environment.

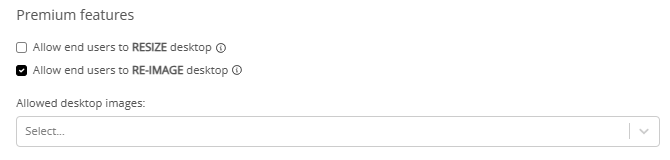
Premium features
- The first premium feature is to allow end-users to resize their machine. This can be useful if they have a task to do that for a short period of time that requires more CPU or memory.

- The second premium feature is to allow the end-users to re-image the session host. Here the IT admin can choose what image are available
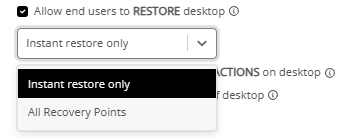
- The third option is to give the end-users the option to restore their own session host. For this to work, the backup option in Nerdio needs to be activated. When it’s activated the IT admin can choose if the end-user can do an instant restore or restore from any restore point.

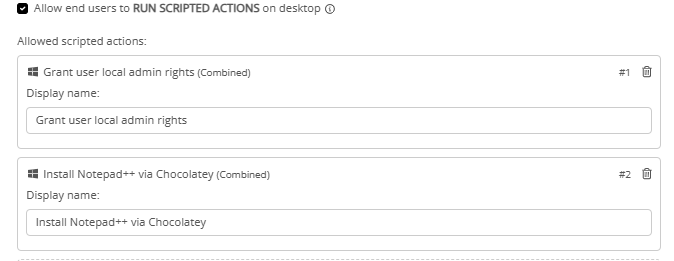
- The fourth option is whether to allow end-users to run scripted actions on their machine. This can be for example granting local admin permissions or installing applications.
- The last premium feature is to allow end-users to change the tags on the session host.

These are all the features that the IT admin can configure for the end-user to use in the self service user portal. In part 2, I’ll take a look in the User portal and see how these features work in there.
Feel free to contact me in case of any questions about this post. See you in part 2.
1 thought on “The Nerdio User Self Service Portal Part 1: The admin view”