
Hi everyone,
Security is a big topic in every organization these days and it is indeed really important especially with all the cyber-attacks. The IT admin can use Defender for Cloud to make a Cloud environment more secure.
Defender for Cloud is a cloud-native application protection platform (CNAPP) that will help you keeping your environment safe. You can start using Defender for Cloud in the free tier. In this blog post I’ll show you how to enable Defender for Cloud using Azure policy. For more info about Defender for Cloud, check out this link.
In this blog post I want to use this initiative to enable the Defender plans for an AVD subscription.
When searching for Defender in Azure policy, the IT admin can find an policy initiative. This initiative combines all the separate Defender for Cloud policies.
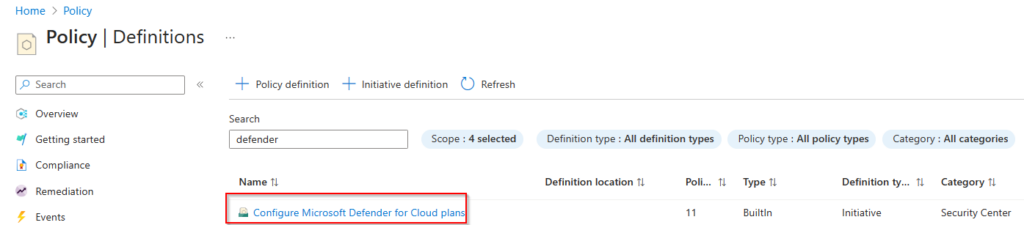
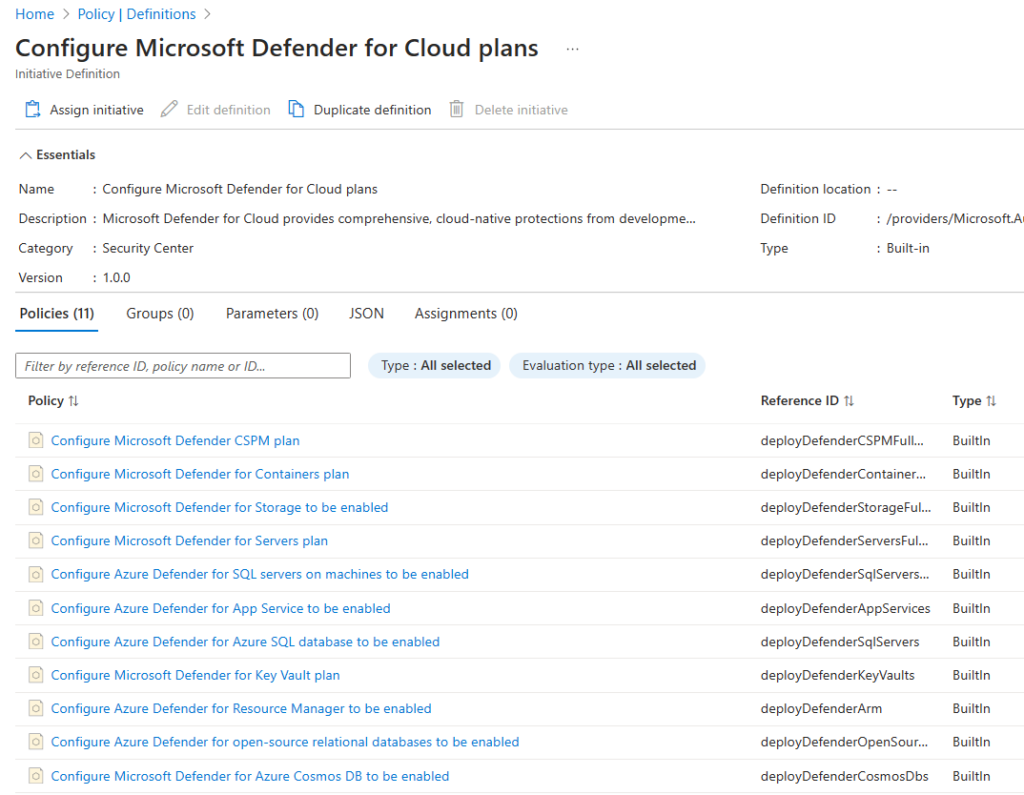
When looking at the initiative, we see that it contains separate policies for all the different Defender plans. These can also be used separately but more on this later in this blog post.
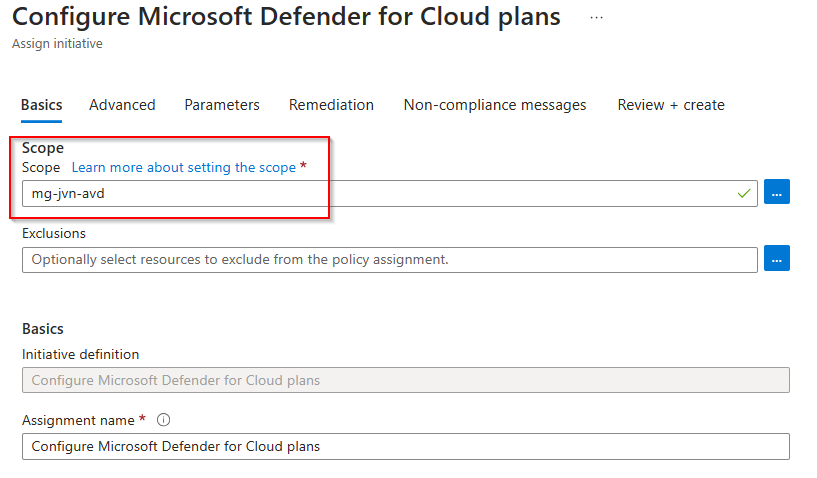
Let’s see first how to enable the initiative by press the Assign initiative button.
First we need to assign a scope to the initiative, in this case the AVD management group. It’s also possible to assign it to a subscription.
The next tab that requires input from the IT admin is the Remediation tab. Here we can define a managed identity that will be used to activate the plans. For security purposes it’s better to create a dedicated managed identity.
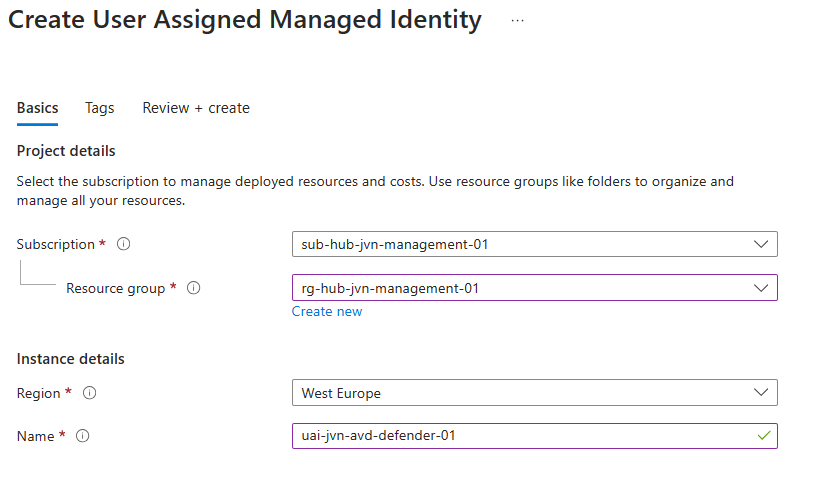
In the Remediation tab, we can now choose the user assigned managed identity. The managed identity will also be the necessary permissions.

The last step is to create a non-compliant message if required and review+create the inititiave.
Now that the initiative is assigned, it needs to be applied to the current management group. This is done using a remediation task.
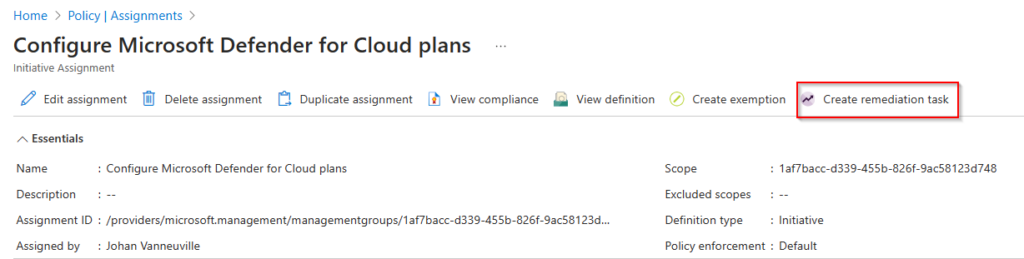
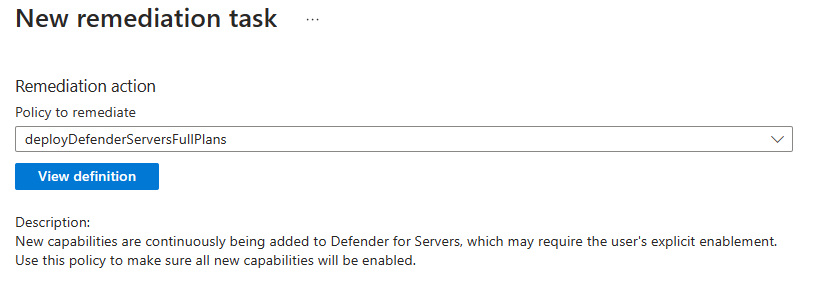
The remediation task must be done for the different policies that this initiative contains. In this example, the IT admin creates the remediation task for the server plan
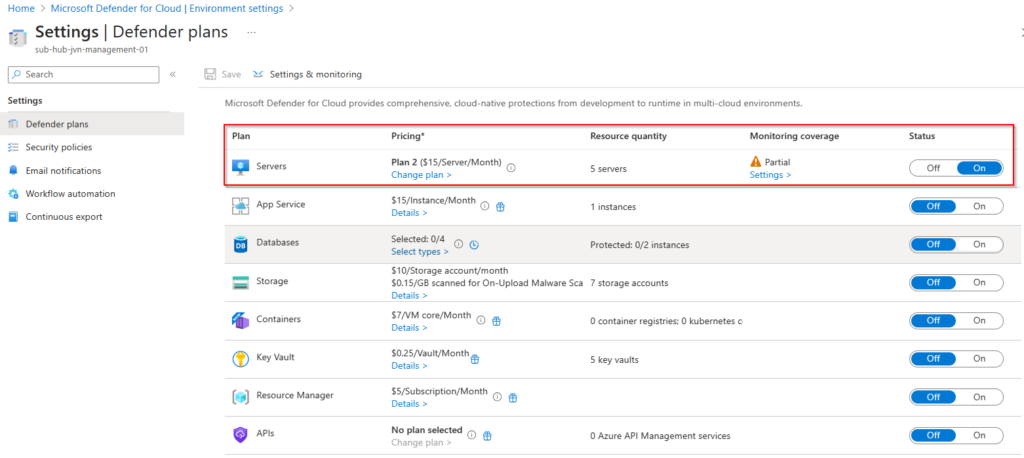
When the remediation task is finished, the IT admin can see that the Defender for Server plan has been activated.
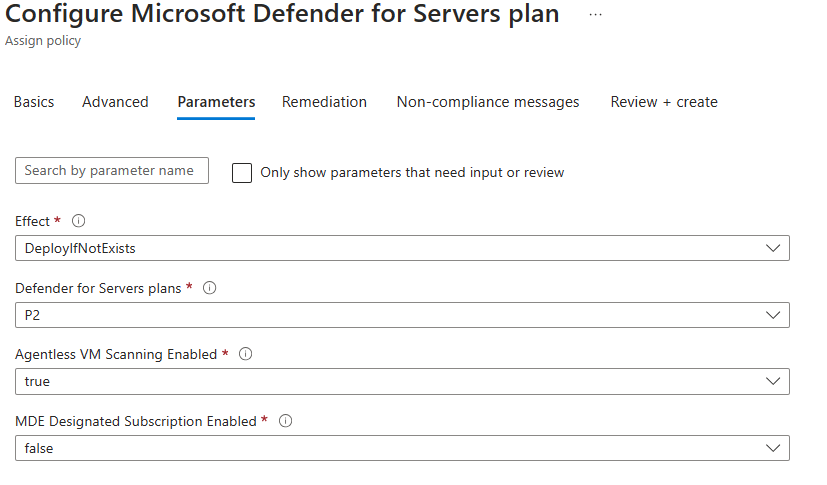
Of course, the IT can also choose not to use the policy initiative but the separate policies. When we want to assign the policy for the Defender for Cloud servers plan, the IT admin can configure some parameters like what plan to configure. This will default to plan 2.
This method of activating Defender for Cloud plans is very easy and less time consuming. This example is for an AVD subscription, but it can be used for every subscription in an Azure environment.
Feel free to reach out to me on my socials or by leaving a comment here.