
The Most anticipated and requested feature for Azure Virtual Desktop is finally in public preview. Since the beginning of the service, everybody wanted to eliminate the need to have a domain controller or AADDS in place for your AVD deployment to work.
This week at Inspire Microsoft announced the AAD Join feature. In this blogpost I’ll walk you through the deployment of a new hostpool with a session host that is AAD joined.
Create The hostpool
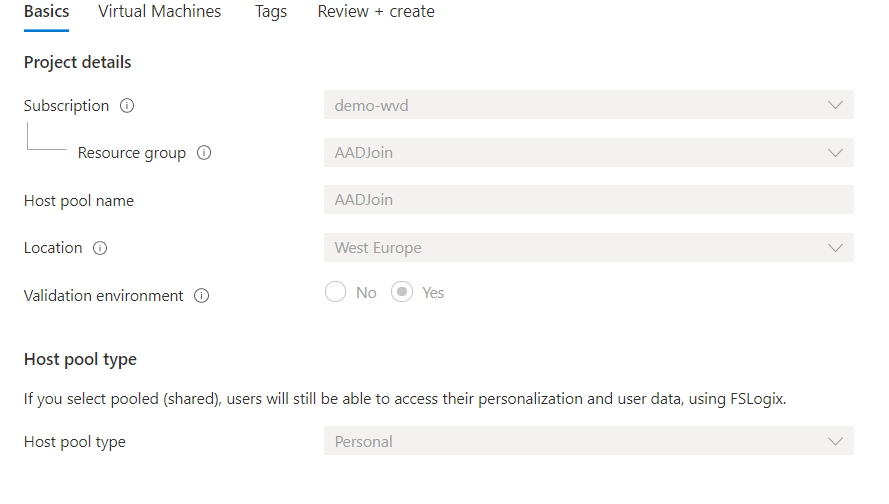
The first step to enjoy this feature is to create a new hostpool. It’s the exact same way as in the past only for this feature to work you need to put Validation Environment to “Yes”. For this demo I create a personal hostpool with automatic assignment.
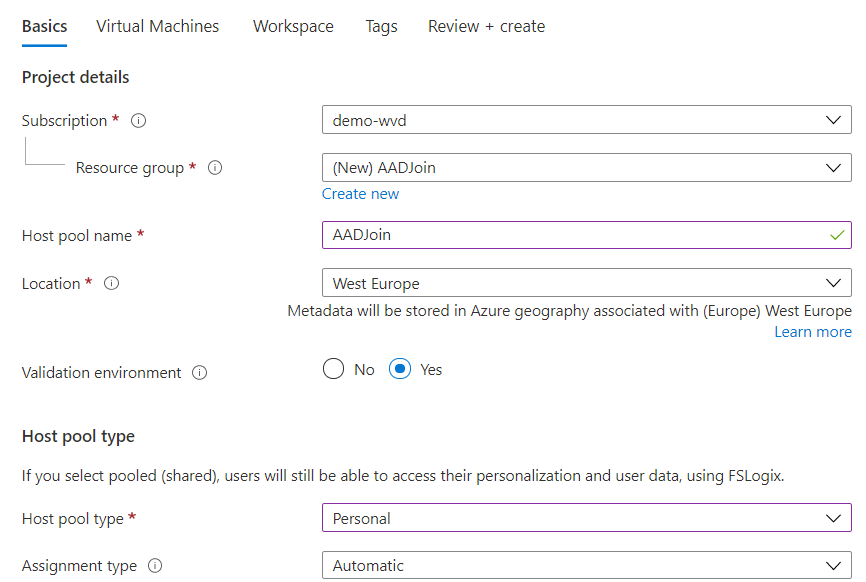
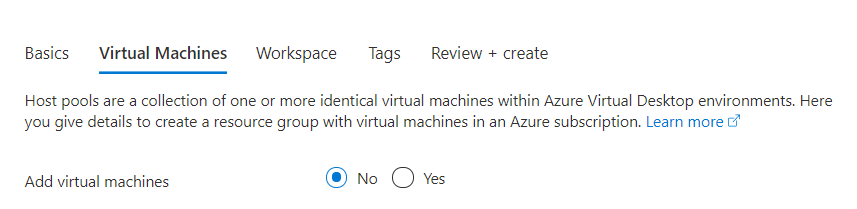
For the moment I choose not to add the virtual machines, I’ll do this later.
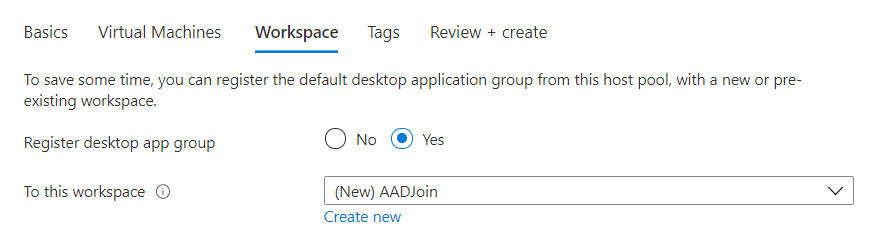
Next step is to create a new workspace
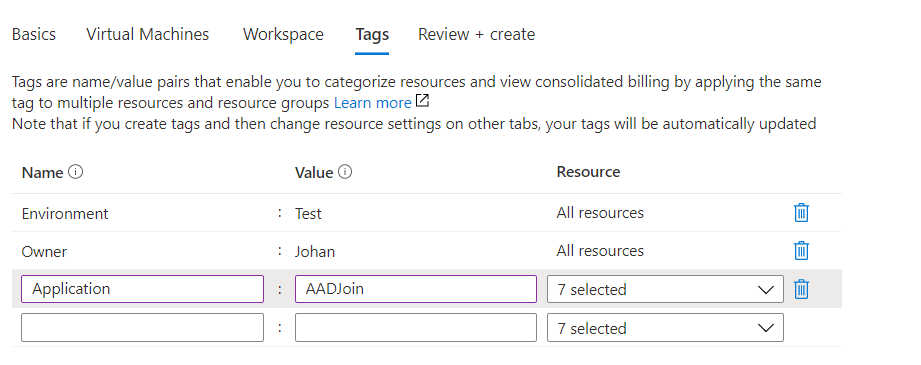
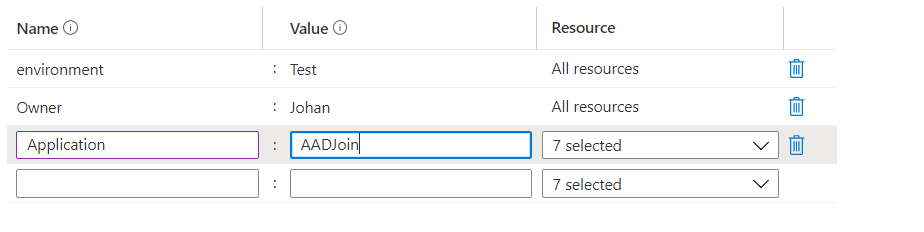
The final step in the hostpool creation is to add your tags. The tags I’ve taken are just examples.
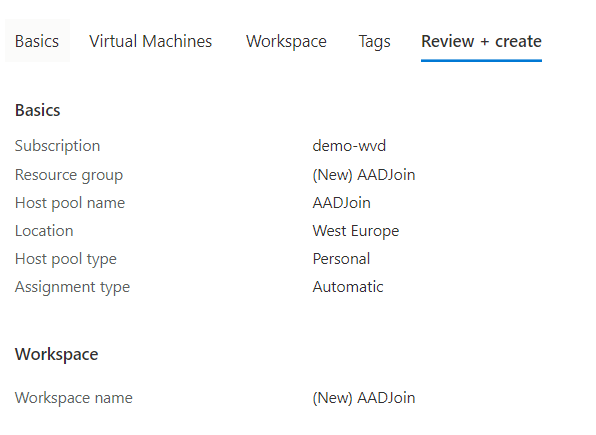
Review your details and click “Create”
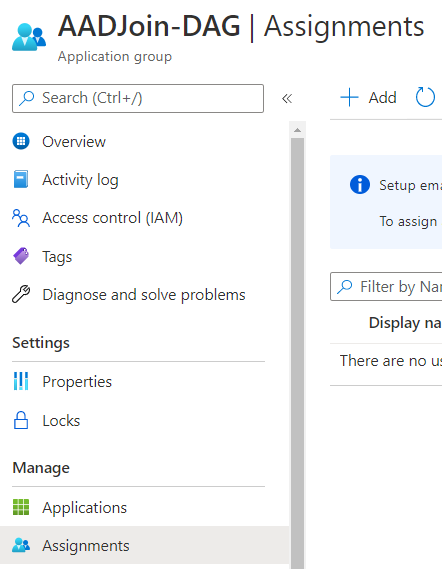
Assigning users to your DAG
To make sure the users can access the desktop you need to assign them permissions. This is the same as with all your other hostpools.
Go to your DAG and click on assignments and click on “Add”
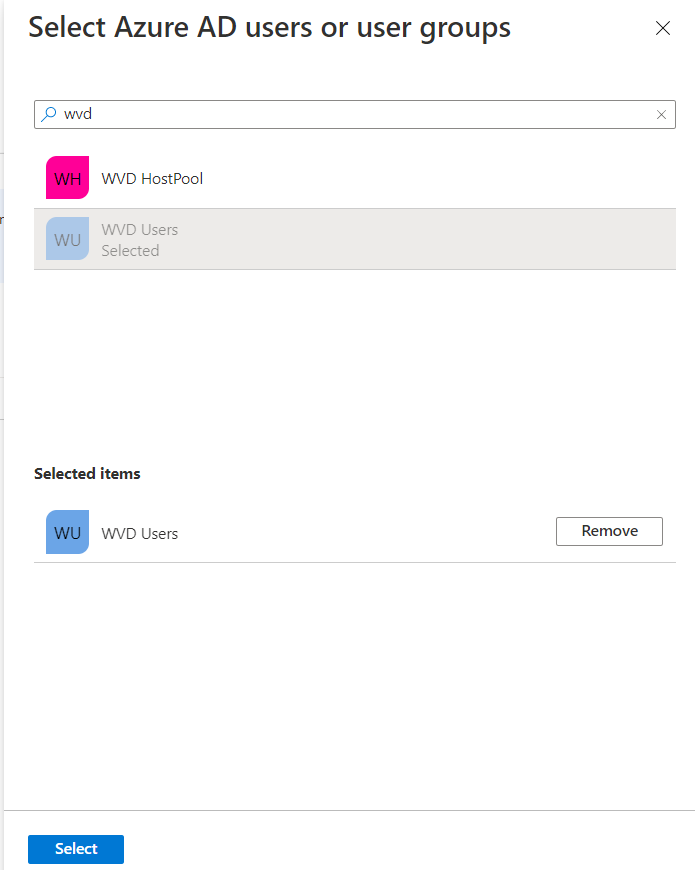
Select your users and click “Select”
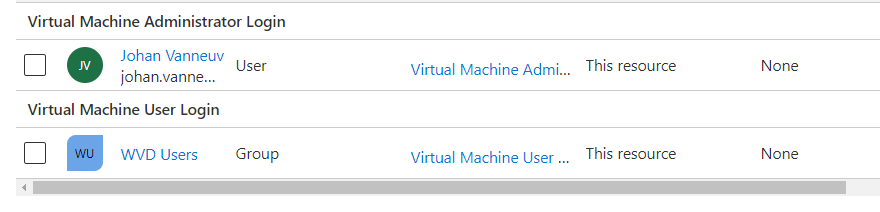
AAD Role Assignments
To make sure the users can logon to the virtual machine you need to add a Role Assignment. The 2 roles that you need are:
- Virtual Machine Administrator Login
- Virtual Machine User Login
To make sure that new user are granted the role assignment automatic you can add your WVD users group to this role assignment.
Go to the IAM of the resource group and assign them as you can see below.
Configure AVD RDP Properties
For your hostpool to know that the Session Host in the hostpool is AAD joined you need to add an advanced RDP property.
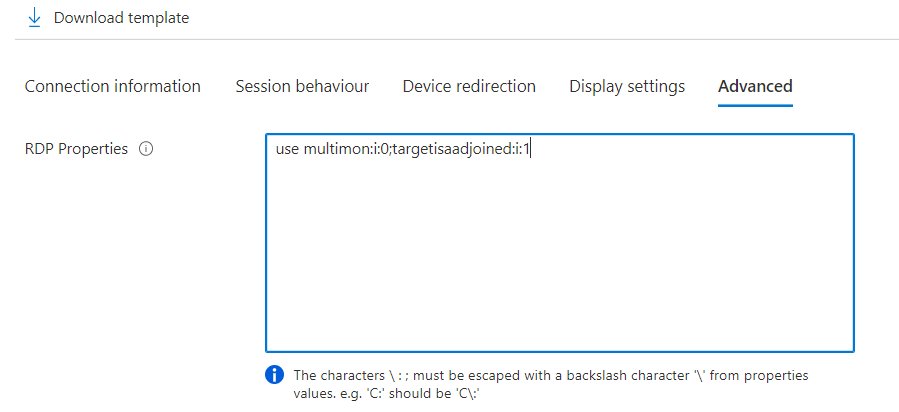
When adding it you will also be able to use any device to connect with AVD. Otherwise you can only use the windows client.
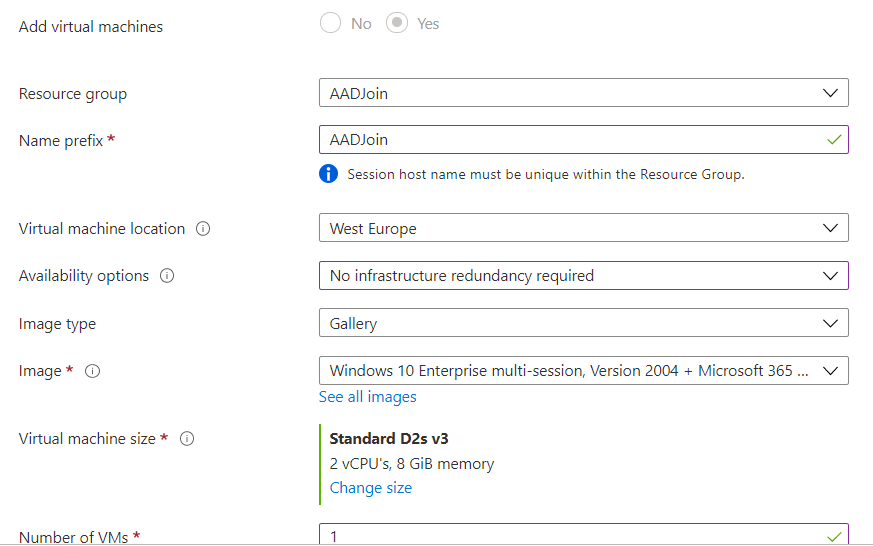
Deploy Session Hosts
The final step to make this feature work is to add session hosts. the first step is the same as always. The first settings are the details of your hostpool so click next.
For this demo I’ll choose a small machine with redundancy but with the latest version.
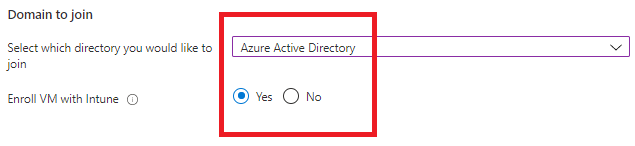
Now comes the important part. For the domain to join option we now have a dropdown menu and we are able to select Azure Active Directory.

I’ll choose to Enroll the VM with Intune

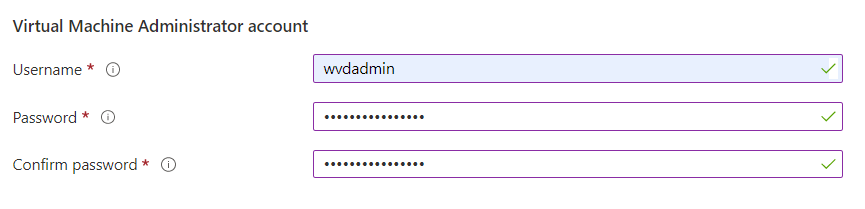
The last step is to add the VM admin account
Add your tags and you are good to go
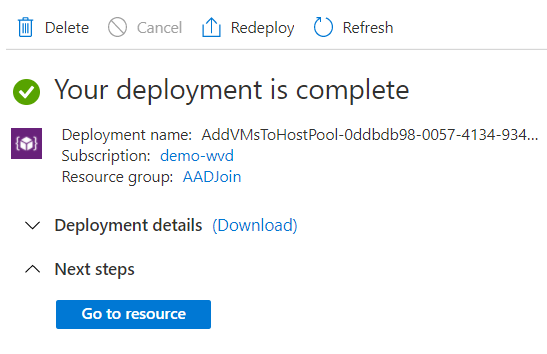
After a while the deployment is complete
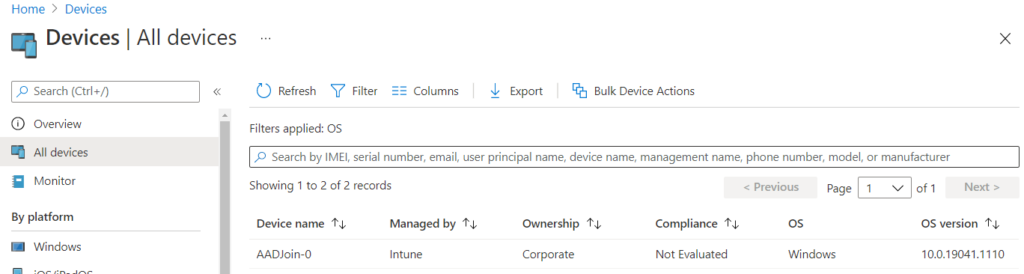
When we go to Azure Active Directory and look in the Devices blade we can see the vm and the MDM type is set to Microsoft Intune.

We can check the same but this time in the Microsoft Endpoint Manager console. Because I selected Enroll with Intune the device is automaticly in here.
Your credentials did not work error
When first authenticating to the vm you might get this error
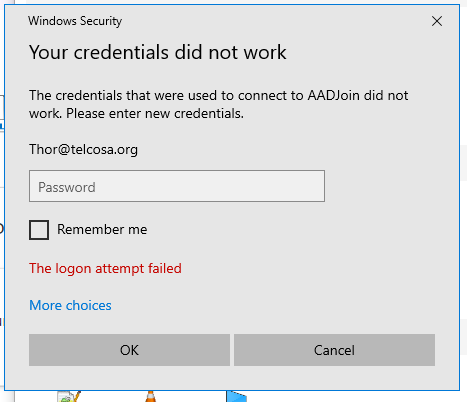
The way to fix this is to enable PKU2U authentication in your local policy and put this on enabled.

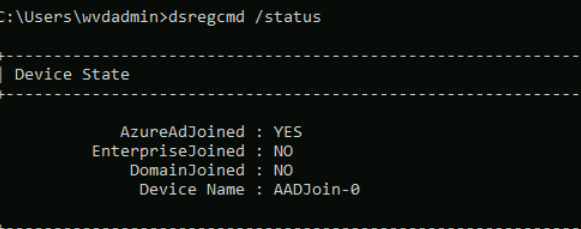
For our final step to check wether the AAD join worked we can run the command dsregcmd /status.
I hope you enjoy reading this blogpost and go and try this feature yourself.
Hi, thanks for the post but it’s still not working for me. I did not have the role assignments. I added those and re-started the VM’s but still not working. I guess I’ll just wait until Microsoft gets the service fully functional.
sorry for the late reply, did you check that security policy? MFA enabled?