Hi All,
Welcome to my next blog blog post about Nerdio and Azure.
When you are working in Azure a very important item is naming convention. Your company might have a strict policy of how all the resources should be named. To learn more about naming convention and see what Microsoft recommends, check out this link.
When deploying Nerdio you get a couple of Azure resources that have a specific naming convention. It always starts with “nmw-app-” and some randomized characters.
About 3 months ago Nerdio released an article how you can use your own storage accounts with you custom naming convention. In the article they describe how to make sure that Nerdio Manager can use these storage accounts and how they should be configured. Configure Custom Storage Account Names – Nerdio Manager for Enterprise (zendesk.com)
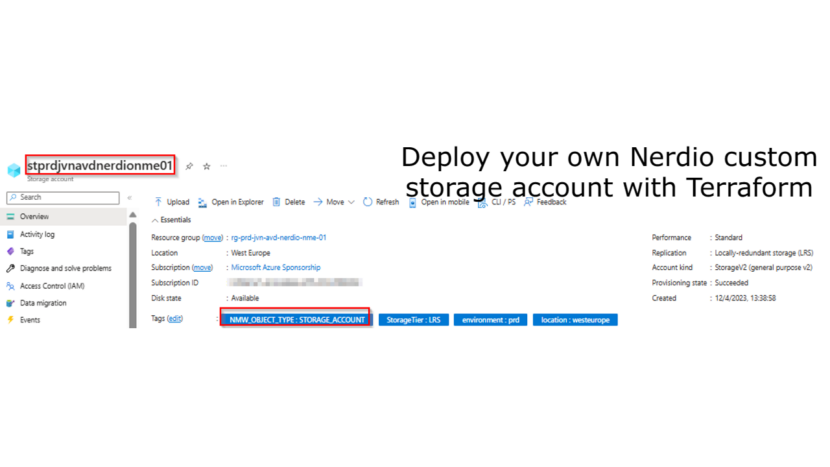
In this blog I’m going to deploy the storage with Terraform and highlight the settings that are the most important.
Since we are adding resources for Nerdio I’m going to add a data block for the resource group where my Nerdio instance is installed.
data "azurerm_resource_group" "nerdio-rg" {
  provider = azurerm.hub
  name     = "rg-${var.env}-${var.prefix}-${var.solution}-nerdio-nme-01"
}
Because I want to harden the storage accounts also I’m adding a data block for the subnet for the app service that I will use in the storage account network rules.
data "azurerm_subnet" "app-service" {
  name = "snet-prd-jvn-avd-app-service-01"
  virtual_network_name = "vnet-prd-jvn-avd-we-01"
  resource_group_name = "rg-prd-jvn-avd-networking-01"
}
The storage account
The first resource we need is the storage account. When deploying the storage account I’m going to harden it also. I only want the storage account to be available for the app service of Nerdio.
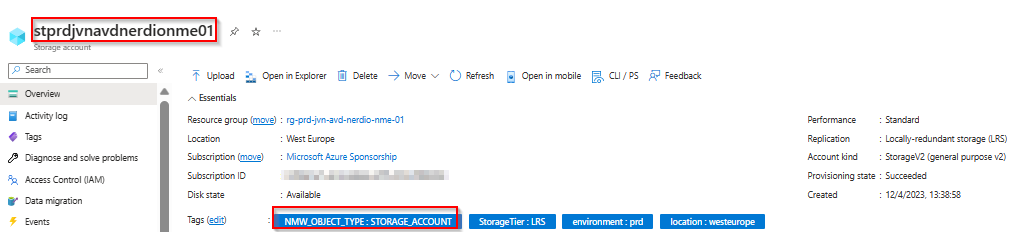
I’m going to start with the storage account for boot diagnostics. Very important is the specific tag that needs to be assigned to the storage account. As you might notice in this block of code, that I’m leaving the access public. This is for a specific reason.
When you close the public access before you create a container, you will not be able to do this anymore.
resource "azurerm_storage_account" "nerdio-sa-boot" {
  provider                 = azurerm.hub
  name                     = "st${var.env}${var.prefix}${var.solution}nerdionme01"
  resource_group_name      = data.azurerm_resource_group.nerdio-rg.name
  location                 = data.azurerm_resource_group.nerdio-rg.location
  account_tier             = "Standard"
  account_replication_type = "LRS"
  account_kind             = "StorageV2"
  enable_https_traffic_only = true
  allow_nested_items_to_be_public = true
  #allow_blob_public_access = true
  shared_access_key_enabled = true
  public_network_access_enabled = true
  min_tls_version = "TLS1_2"
  #azure_files_authentication {
  #  directory_type = "AADKERB"
  #}
  tags = {
    "location"    = "westeurope"
    "environment" = "prd"
    "StorageTier" = "LRS"
    "NMW_OBJECT_TYPE" = "STORAGE_ACCOUNT"
  }
}
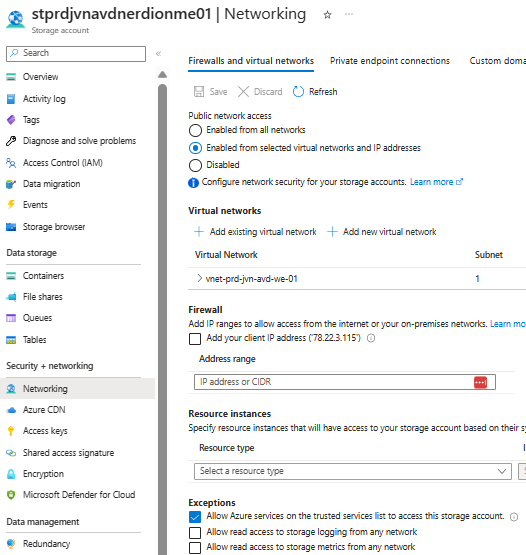
You can bypass the storage account firewall with a specific Terraform resource. Here you can also add for example your public ip so you are still able to access the storage in the Azure portal. In this block also I give the app service subnet access, so that Nerdio can access the storage account.
resource "azurerm_storage_account_network_rules" "nerdio-sa-boot" {
  storage_account_id = azurerm_storage_account.nerdio-sa-boot.id

  default_action             = "Deny"
  virtual_network_subnet_ids = ["${data.azurerm_subnet.app-service.id}"]
  bypass                     = ["AzureServices"]
}
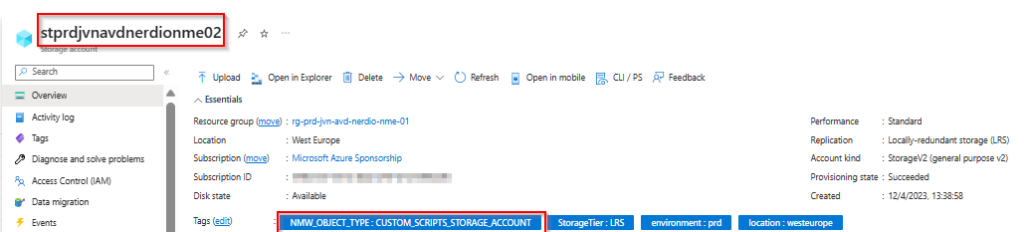
The next storage account I’ll talk about is the one for Scripted actions
resource "azurerm_storage_account" "nerdio-sa-customscript" {
  provider                 = azurerm.hub
  name                     = "st${var.env}${var.prefix}${var.solution}nerdionme02"
  resource_group_name      = data.azurerm_resource_group.nerdio-rg.name
  location                 = data.azurerm_resource_group.nerdio-rg.location
  account_tier             = "Standard"
  account_replication_type = "LRS"
  account_kind             = "StorageV2"
  enable_https_traffic_only = true
  allow_nested_items_to_be_public = true
  #allow_blob_public_access = true
  shared_access_key_enabled = true
  public_network_access_enabled = true
  min_tls_version = "TLS1_2"
  #azure_files_authentication {
  #  directory_type = "AADKERB"
  #}
  tags = {
    "location"    = "westeurope"
    "environment" = "prd"
    "StorageTier" = "LRS"
    "NMW_OBJECT_TYPE" = "CUSTOM_SCRIPTS_STORAGE_ACCOUNT"
  }

}
Now that we have both storage accounts we need to create the container for the “certificate-store”. Before you change the storage for Nerdio you also need to copy any content from the old container to the new one.
resource "azurerm_storage_container" "certificate-store" {
  name = "certificate-store"
  storage_account_name = azurerm_storage_account.nerdio-sa-customscript.name
  container_access_type = "private"
}
At this point we have the storage account and the container. Now we just need to close the public access and disable the access keys. For this to work I’m using an Azure CLI command in a Terraform “null_resource”.
resource "null_resource" "public-nerdionme01" {

  provisioner "local-exec" {
    command = "az storage account update --name stprdjvnavdnerdionme01 --resource-group rg-prd-jvn-avd-nerdio-nme-01 --allow-blob-public-access false --allow-shared-key-access false"

  }
  depends_on = [
    azurerm_storage_account.nerdio-sa-boot
  ]
}
resource "null_resource" "public-nerdionme02" {

  provisioner "local-exec" {
    command = "az storage account update --name stprdjvnavdnerdionme02 --resource-group rg-prd-jvn-avd-nerdio-nme-01 --allow-blob-public-access false --allow-shared-key-access false"

  }
  depends_on = [
    azurerm_storage_container.certificate-store
  ]
}
Now we have the storage account completely locked down so that only the Nerdio app service can access it.
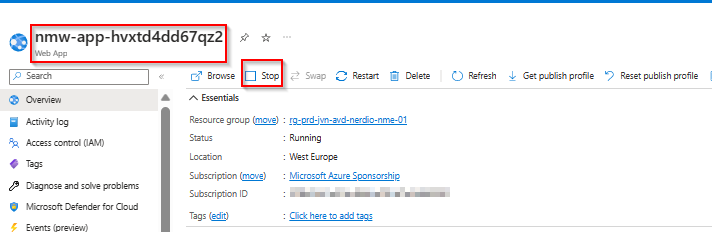
The only you need to do is to switch the storage account. For this you will need to stop the app service and delete the tag on the old storage account and start the app service again.
There you go, you are now using your own custom named storage account for Nerdio Manager for Enterprise.
I hope you find this post useful and if you have any questions about this feel free contact me on my socials.