Hey Everyone,
Welcome to my next blog series about AVD. In this series I’m going to focus on the monitoring part of AVD. You all know that you can configure monitoring of your AVD environment using the AVD Insights. Since the beginning this was done using the Log Analytics Workspace Agent. Since this agent is going end of life next year in August I’ll focus on the Azure Monitor agent. You can read more about it here.
What is needed to make the Azure Monitor Agent work?
There are a couple of things you need before Insights will work with this Agent.
- Data Collection rule
- Azure monitor Agent installed on the session hosts
- Virtual machine with managed identity enabled (system or user)
In Part 1 of this series I showed you how to Deploy the Azure Monitor Agent with Defender for Cloud in the Azure portal. This time I’m going to configure a policy initiative that is built-in to Azure. Th policy initiative will make sure that the session hosts have the Azure Monitor Agent installed and that they are associated with the Data Collection Rule.
Let’s first create the data collection rule because we need it when configuring the policy initiative.
Data Collection rule
The data collection rule lets the IT admin determine which logs and performance counters are collected from the virtual machines. First step is to give the rule a name and select the platform type. In this case Windows.

In the next step we need to add resources.

Let’s select the entire subscription, in the most ideal situation a dedicated AVD subscription.

In the next step Collect and deliver the IT admin can add the data sources to this rule with the Add data source button.

There are 2 data sources that can be configured, Performance Counters and Windows Event Logs.

The IT admin can configure multiple performance counters in this rule like CPU, Memory, etc…In this example I’ll take the defaults.

The last for the performance counters is the destination. In this case the IT admin sends the logs to a dedicated workspace in the hub.

The next data source that the IT admin can configure are the Windows event Logs. In this example all the options are selected.

The IT admin can review the settings that are configured before configuring the necessary tags.

Last step is to add the necessary tags.

Policy Initiative
Now that the data collection is created, The IT admin can focus on modifying the policy initiative. The documentation for this can be found here. There are 4 policies in this definition.
First is to scope this initiative. In this case I’m scoping it to my management group for AVD.

Next are the Parameters. Here we need to define the data collection rule id. This can be found in the JSON View of the data collection rule.
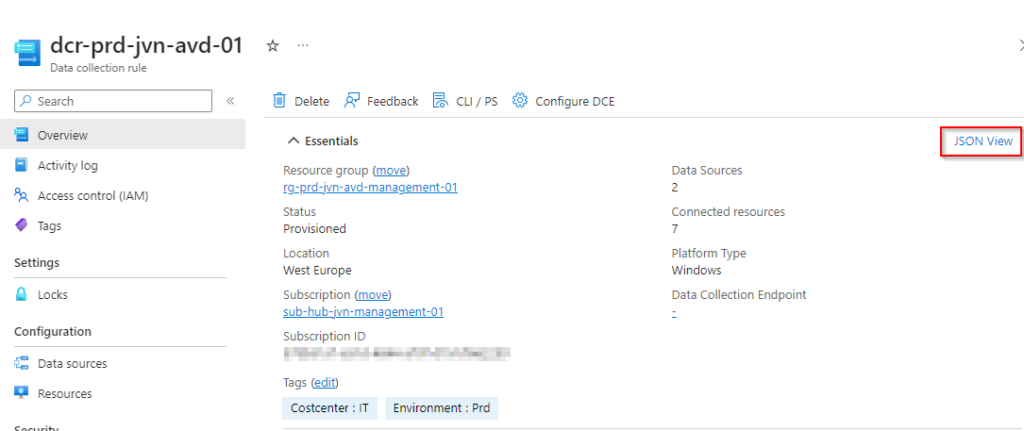
There is a copy button so here so better to use that.


The next step is to select a managed identity or let Azure create one for you. When you have a lot of machines that you need to onboard it might be easier to use a User assigned managed identity. First select the scope.
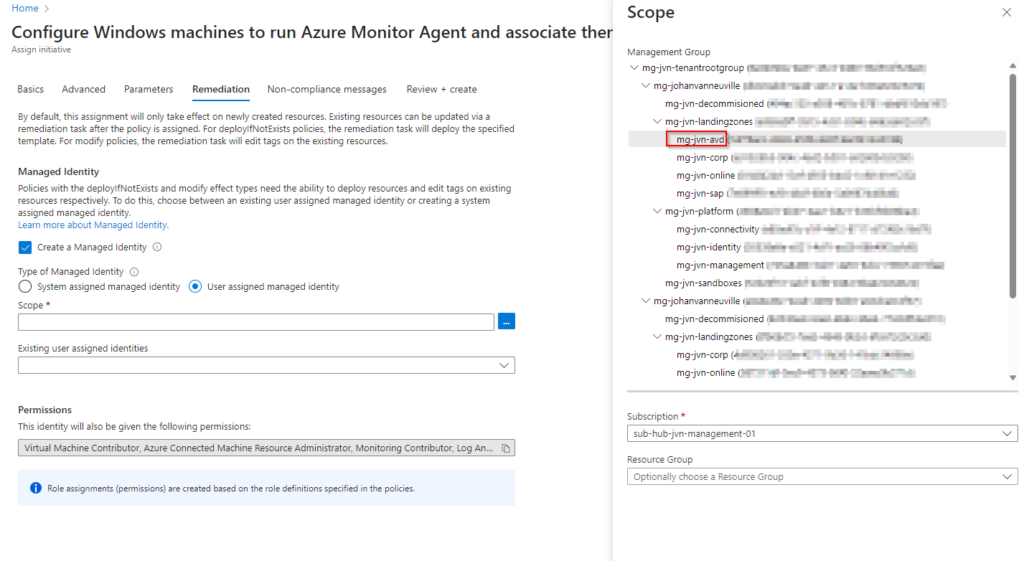
Next select the managed identity that you want to use.

The final step is to create a Non-Compliance message for this initiative and review+ create all the settings.

When created you will get the following status messages.

To ensure that all machines all running the Azure Monitor Agent, the IT admin can create a remediation task.

You will get a list of machines that will get the agent.
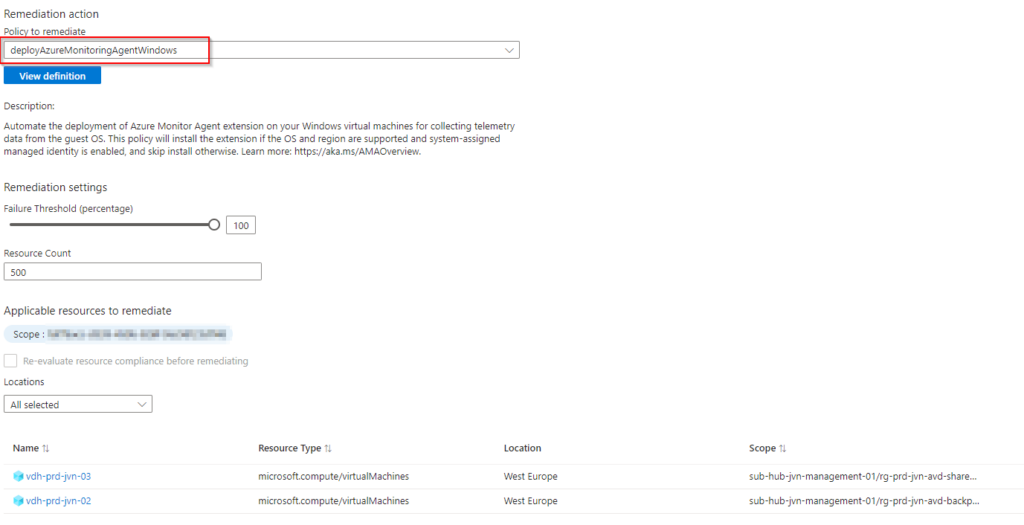
The IT admin can view what the remediation task is doing.

After the installation the agent will be visible in the Extensions blade.
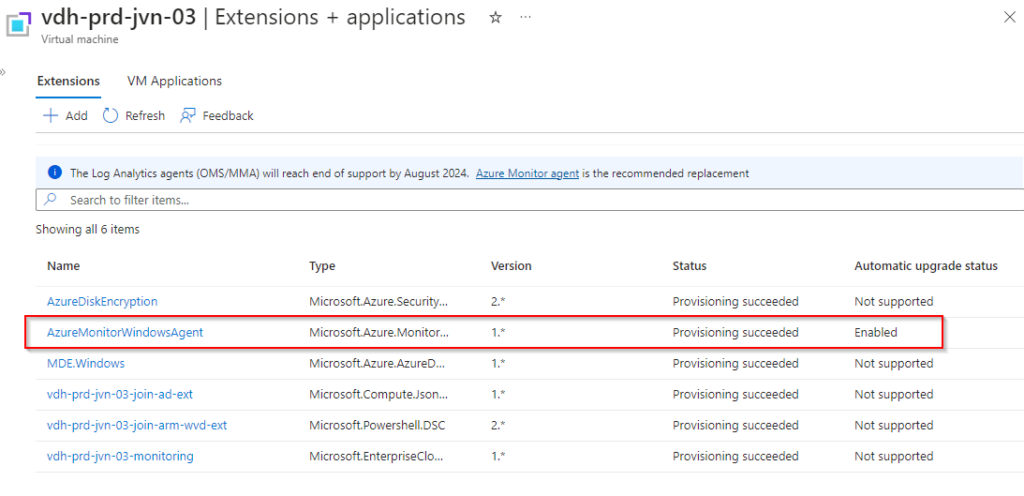
The IT admin can also check how many agents are connected to the log analytics workspace in the agent blade of the workspace.

There you go, the installation from the AMA agent using an Azure Policy Initiative. I hope this blogpost will help you make the switch from the MMA to the AMA agent.
Feel free to contact me in case you have questions or if something isn’t clear.
1 thought on “Monitor AVD with the Azure Monitor Agent part 2: Using Azure Policy”